Sunday, December 30, 2012

Pear and Persimmon Chutney for CanItUp


   I am apparently on a roll to keep myself busy by cooking/baking almost every day of December. After a busy day at work, I find the chopping, stirring, kneading kind of meditative, and the smell of the food helps to bring cheerful thoughts. I feel lucky to have friends who also enjoy cooking and baking.  I have been delighted to receive homemade goods from nuts to jam to marshmallow to bao (Chinese-style buns/breads).  I love the care and love that went into each of these gifts.  And I love that my friends chose the flavors for me that they knew I would enjoy.  I also gave out baked goods and preserves to some friends.  For those of us who love to cook and bake, it's truly gratifying to see the joy on others' faces as they open their gift bags and discover the baked goods.  I've been reading a lot in the papers, including the New York Times, about the lack of manners and how people don't thank others anymore. I've had a couple of bad experiences but for the most part, my friends have been so good as to write me notes or call to show their appreciation. It's especially nice when I can surprise someone with the goodies. 

   After the baked goods and other gifts I had to pack for friends and family, I finally got around to this month's Can It Up.  I have also contributed to December's Bundt-a-month with the decadent and oh-so-good Bourbon Dark Chocolate Bundt Cake. Bundt-a-month is hosted by Cake Duchess and Baker Street, both inventive and prolific bakers.  Hima of All Four Burners chose booze as the theme for December's Can It Up.  Hima hosts this year's Preserving challenge called Can It Up (used to be called Can Jam). Really, you can think of it as a can/preserve-along, like Knit-alongs.  It's fun and we do it for the camaraderie of others who preserve.  I love seeing what others come up with for each month's theme. For the ground rules, click here.  Here is my contribution to Can It Up - Pear and Persimmon Chutney. 


   Every Fall, I know that I will be getting persimmons because my parents know that I like persimmons and they always get a lot for me whenever they see it at the market.  I am lucky that way.  Aren't persimmons beautiful? I love its orange color.  It's so evocative of Fall/Autumn.  There are many varieties of persimmons but the most commonly available commercial ones are the hachiya and the fuyu.  Basically, the hachiya belongs to the astringent category and must be eaten only when fully ripe (almost mushy to touch) or the high tannin will leave quite an astringent quality on your tongue. I've made that mistake before! The fuyu belongs to the nonastringent category of persimmons. It's like an apple and crisp even when ripe. 


Pears are also very much a fruit of the Fall season. I love pears, which remind me of the occasions of sweet juice dripping down as I tried to catch every last drop. 

   I was inspired when I read Marisa's post about persimmon chutney in a creative e-spread she did in collaboration with others. Here is the link to her inspirational spread: http://www.foodinjars.com/2012/11/in-deep-autumn/  

   For this month's preserve, I used Marisa's recipe as base and riffed off of that. I used what I had and added the note of booze.  As I was pouring out my apple cider vinegar, I saw that it was running out. Oh so sad, but I have a stash of white vinegar so I added the white vinegar to get the right amount of acid in the recipe.  I used my persimmons and pears, and the last tablespoon of bourbon that I had! I think this would be lovely on crackers, cheese or as a side for dinner. Or add to a chicken, turkey or ham sandwich. This is making me hungry thinking about it. 

With the fruit that I had and Marisa's recipe as inspiration, this is the result:

Pear and Persimmon Chutney

Ingredients:

3 cups peeled and chopped persimmons (about 4 medium Fuyu persimmons)
3 cups chopped pears (unpeeled and about 2 big Anjou pears)
Half of red onion, chopped
2 tablespoon flame raisins
1 tablespoon bourbon
3/4 cup apple cider vinegar
1 tablespoon ground cloves
1 teaspoon grated ginger or more to taste
1 ts salt
2/3 cup light brown sugar
Pinch of ground allspice

Instructions:

1. Soak the raisins in the bourbon. Then peel and chop the persimmons. Chop the pears with skin on. Chop the onion. 
2. Put persimmon and pears and onion into a wide heavy-bottomed pot. Add in vinegar and sugar.  Cook on medium-high heat until it boils, then lower heat a little. Stir frequently.
3. Add in raisins and bourbon if any was not soaked by raisins. Add cloves, grated ginger, salt and allspice. Cook and stir for about 35-45 minutes to the right consistency (thick sauce).  Taste and add more spices to your taste. 
4. Add some chili if you like heat in your chutney. 
5. Turn off heat, put into jars and add lid. Process in water bath for 10 minutes. 

Yield: Four 1/2 pint jars

Enjoy!

Sunday, December 23, 2012

Holiday party: Bourbon Dark Chocolate Bundt Cake


   I recently went to a good friend's home for a Holiday party and brought along with me a bundt cake that has become my favorite.  I've made many bundt cakes now but this cake really shined and may have aided in gaining me new friends!  

   I often clip recipes that look interesting to me from the New York Times as well as from various food magazines. Now I've got blogs to bookmark online too! So many recipes and so little time. I like recipes that look easy to do and sounds like the food will be tasty, but I also like challenging recipes for the days when I want to learn new skills.

   One of the recipes I clipped from several years ago that I've been wanting to try is Melissa Clark's Whiskey-soaked dark chocolate bundt cake. I am glad this month's bundt-a-month theme is Boozy December because this recipe is perfect for that! To learn more about bundt-a-month, see http://bakerstreet.tv/bundtamonth/ and Cake Duchess.  Back to my bundt, Melissa Clark writes good recipes - easy to follow, interesting flavor profiles and delicious results. This particular recipe always sounded intriguing to me. If you've followed my blog, you know that chocolate is one of my favorite foods.  But more than the fact that I love chocolate, chocolate goods are one of those items that almost always bring a smile to a gift recipient. I know that not everyone loves chocolate or cocoa. (Gasp!) But I have found that to most people, chocolate represents a kind of luxury. So for me, my various chocolate baked goods have been welcomed gifts to friends and colleagues.

   When I was thinking about what to bring to my friend's party, I thought I can't go wrong with chocolate.  Problem was other than my friend, her husband and children, I don't know the others at her party. I decided to take a gamble and go with Melissa's Whiskey-soaked dark chocolate cake. Wow, was I glad I did! The recipe sounded luxurious and simple enough to do, even after work one night. I was tired but determined to get a cake baked for my friend's party.  As I was mixing the bourbon with the cocoa and espresso powders, I was struck by just how much whiskey this recipe called for! I've read other similar recipes, like one for Kentucky Bourbon cake, but all called for half the amount of alcohol.  I mean, just look at that deep dark color of the sauce.  I could smell the bourbon from afar! 


I started to get worried because my friend really doesn't drink and I wasn't sure if her friends drank.  I may not get invited back for another party...

   I need not have worried because everyone at her party Loved the cake!   It was a cold windy day with some snow flakes floating in the air. I carried that cake and gifts through NJ Transit train then the NYC subway to my friend's home. Once there, my friend had lots of yummy savory items for us to enjoy.  She made delicious chicken wings and pernil.  Other friends had brought along little cupcakes and cookies for all the kids to enjoy.  We laughed and we ate.  We had coffee, talked, laughed and ate more. My new friends all generously told me how they loved the cake.  And I did too.
  
  I followed Melissa's recipe pretty closely (full recipe by clicking here). I used Valhrona cocoa powder and King Arthur Flour's espresso powder because that's what I had left from my other chocolate baked adventures. My cake was done in less than an hour so make sure you start checking your cake after around 50 minutes. I've read a lot of people say how hard it is to get the cake to come out of the bundt pan in one piece and I used to have the same problem.  My best solution has been the oil spray with flour.  Baker's Joy has it and so does Spectrum oil.  I've found it at Trader Joe's and Whole Foods, and of course, at baking supply shops. The oil spray works like wonder for the bundt pan. Just spray all over the pan. If you have just oil spray, not one with flour, you can then dust your pan with flour, or in this case, cocoa powder after thoroughly spraying pan with oil.  Just tip pan around and turn it over to dump out extra powder. Also I used honey bourbon so I called my cake Bourbon Dark Chocolate Bundt Cake. 

   Whatever you called this cake, it is moist on the inside but the crust has a little crunch. It's not too sweet and it has a clear mocha taste.  Personally, I like cakes that are not too sweet so I actually went back for more slices. Just a fair warning, you can also taste the bourbon.  I don't think the alcohol is overwhelming, it adds to the depth of flavor. But this cake is not your usual store-bought chocolate cake, which I find is more sugar-sweet than anything else. This cake beautifully blends the alcohol and espresso with the chocolate into a decadent treat that you want to go back for again and again. Thanks Melissa for such a great recipe.  

   We ate so much of it that I do not have an extra slice to show you! 

Sunday, December 16, 2012

Holiday Edible Gifts: Chocolate Straws


   It's that time of year when many households are baking for dinner parties, gifts and just plain eating.  I decided that this year I will mainly give edible and homemade goods as gifts. For some, knowing that there is something they really want, I added non-edible gifts. This year I am proud of myself for not just making the gifts, but importantly, packing and mailing the goods in early December. The packing and mailing part had been my downfall in past years. I would buy nice gifts but then have to go back to the store, which is quite unpleasant with the crowds this time of year, to get packing material. Once packed, I still have to somehow get to the post office in time and get on line to mail that package and those cards. Then days go by and January inches closer... The trials and tribulations of gift-giving but I truly enjoy giving gifts to my friends and family, especially when I know that there is something that can make their day.  

   I'll share some goodies that have received good reviews already. For example, these Chocolate Blocks got reviews of "yummy" and "can I have more?" from little ones. King Arthur Flour's recipes have been great. I'll write more about another one of their chocolate recipes that received rave reviews.  First, I'll tell you about these Chocolate Straws that I made.  The recipe is by Julia Moskin of the New York Times. This recipe is just perfect for this time of year when you've got so many tasks to complete.  You can do this in a relatively short time and put them in pretty or plain long cellophane bags and finish with a pretty ribbon. At least that's what I did. 

   I used Trader Joe's puff pastry and let it sit overnight in the refrigerator to thaw. They were pretty easy to work with the next evening.  I rolled out puff pastry, then while they go back in the fridge, I started grating the chocolate. You can use a box grater or use a serrated knife to grate the chocolate. When Williams Sonoma had a sale, I could not resist and went into the store. I got one of my favorite tools, the microplane zester. This one, however, is different from the basic and original one I got years ago. This one can create slightly wider strips, more like ribbons.  It looks like this and worked like wonders on the chocolate without creating a mess. See the shavings of chocolate?

I combined bittersweet chocolate with turbinado sugar for a deeper flavor. The turbinado sugar has a light, almost molasses flavor. Good puff pastry has lots and lots of butter but these Chocolate Straws really come out light, flaky and full of good chocolate goodness.   I was going to sprinkle some sugar on these once they come out of the oven for a little sparkle but it was getting late so I didn't do it this time. They would make nice bites for a dinner party as well.

          CHOCOLATE STRAWS
  • INGREDIENTS
  • Flour, for rolling
  • 1 pound puff pastry, preferably made with butter
  • 2 ounces bittersweet or semisweet chocolate, finely grated (use a Microplane or rotary cheese grater)
  • 2 tablespoons granulated sugar
  • 2 tablespoons butter, melted

PREPARATION

1.
Heat oven to 375 degrees, or 350 degrees with convection. Line two baking sheets with parchment paper or silicone mats.
2.
Lightly flour a work surface. Use a rolling pin to roll the pastry into a long rectangle, about 8 inches wide, turning over a few times to distribute the flour evenly. Patch any cracks with warm water and roll smooth.
3.
Combine chocolate and sugar in a bowl and set aside.
4.
Turn the pastry so the long side is facing you. Using a ruler or straight edge, trim off edges so the rectangle is smooth and straight. Cut the rectangle in half, top to bottom, into two smaller rectangles of equal size. Refrigerate for 20 minutes
5.
Brush both rectangles with melted butter. Sprinkle the chocolate-sugar mixture evenly over one rectangle and place the other on top, butter side down. Use the rolling pin to roll out and press the two layers together.
6.
Using a ruler (if desired), cut into strips about 8 inches long and 3/4- to 1-inch wide. Lift up a strip by the ends, gently twist it two or three times, and place on the prepared pan. Press the ends flat. Repeat, leaving about 1/2 inch of space between straws.
7.
Bake until light brown and crisp, 18 to 22 minutes, rotating the pans in the oven after 10 minutes. Cool on a rack.
YIELD
About 1 dozen straws
  

Tuesday, December 4, 2012

Truffles


   If you've been reading my blog, you'll notice that chocolate is a familiar topic. In my world, you just can't go wrong with chocolate, the result of the magical transformation from the cacao bean.  Really, cocoa in general. From chocolate chili waffles to chili to the most recent chocolate blocks, a little chocolate and/or cocoa added depth to the food. Now that it's Holiday baking time and I have to think of delectable gifts to send to recipients who'll appreciate homemade food, I've been thinking a lot about truffles. Some of the best chocolate truffles I've ever had were not expensive yet had just the right creamy middle and a lusciousness as it melted on my tongue. 

   I researched online and in my many cookbooks to find just the right recipe to try. I don't want to spend all day on it or bother with tempering the chocolate. It's my first time making truffles so I thought I would find recipes that are easy to do but delicious. That's the way to gain confidence to harder recipes. The first recipe I tried is a vegan one because I had to mail out a package for a vegan giftee. I have a tendency to come up with lovely ideas for gifts for the Holidays but get sidetracked by work or life in general. Then there's the gift wrapping, boxing and actually mailing it part. This year, I am determined to send my packages on time before I get overwhelmed and give up. That is, I'd end up going on Amazon to get a deal or give the gift certificate.  Now, I am not against giving gift certificates if you know for sure that the recipient can use it. I find that many people give gift certificates without thought of whether the recipient can use it. For example, giving someone a restaurant gift card for a restaurant nowhere near where recipient lives!  But I digress. While I still had the enthusiasm for making Holiday gifts, I went right into it this weekend.

   There were not too many vegan truffle recipes that I could find and did not involve too many ingredients. I did, however, get this month's Whole Living magazine and was happy to find a vegan dark chocolate recipe there. In fact, I was thrilled because it involved all ingredients I already have at home. Here is their full recipe:  Dark Chocolate Truffles

  I used Trader Joe's semi-sweet (65% cocoa) chocolate callets. Unfortunately, my local Trader Joe's no longer stock these.  They are great for these project - no chopping chocolate chunks. For the cream portion, this recipe cleverly used coconut oil. I used what I had on hand, which was the Nutiva coconut oil. I was a bit afraid at first of the coconut scent overwhelming my little nuggets of chocolate goodness. But no worries, they just had a hint of coconut flavor.  I started the process in the night and ended up putting the bowl into the refrigerator. Next time, I won't do that. It really hardened the chocolate. Although the chocolate came back to room temperature after sitting on the counter for some time, it ended up with a hard top shell. That kind of ruined my lovely creamy truffle but I tried to minimize rolling that top shell in.


   I rolled some of them in unsweetened, medium shredded coconut flakes but some just refused to stick on so I thought it would look prettier if I sprinkled on powdered sugar. Ta-da! A little snow on the dark chocolate truffles. I rolled the other half in Valhrona cocoa powder. Why not go for the best when you are making truffles, right? These had a dark chocolate flavor and creamy middle. 

Sunday, December 2, 2012

Holiday Gifts: Chocolate Blocks with peppermint

     One of the joys of being an aunt is creating new traditions with the little ones. As an aunt, I've found that cooking and baking with my nieces is our bonding time. My little nieces generally love to help me with making Thanksgiving dinner. I usually cook the potatoes then let them take turns mash the potatoes. They love it. This year, I thought I'll do something extra special. I read about chocolate stirrers on the webs somewhere and then found the King Arthur Flour's blog about Cocoa Blocks.  I thought it sounded easy enough to do and we all love chocolate. It's such a beautiful idea - make fudgy chocolate blocks then stir the chocolate into hot chocolate milk! Perfect to do together and these make great gifts.


     If you follow the recipe, it would come out looking like this. But be sure to set it aside overnight Or for several hours to firm up. I let it cool at room temperature. The little ones will keep asking, "When can we continue? Is it ready yet?" every hour but resist. It will cut much better once you give it enough hours to firm up. It really does work to dip knife in hot water, then wipe knife and cut into blocks. 


     As additional fun, I had the little ones break up some candy canes from their Halloween stash. It was oh-so-much fun for them, using a little wooden mallet to break up the candy canes. I wrapped candy in foil or paper towel first so as not to have the pieces fly everywhere.  Or you can simply purchase Peppermint Crunch or the Peppermint Snow. It won't be as much fun and you won't be able to take out frustration the same way, but sometimes the easier way is just as good. 


     This is the Chocolate Blocks with the peppermint.  Most of the peppermint is on the bottom. I thought it would look nice and help the truffle-like bottom to be a tad less sticky. Overall, the little ones loved stirred it into hot milk for hot chocolate and they also ate it like fudge. The peppermint added a light minty flavor. It's creamy and definitely a comfort against the cold wintry weather. 

From King Arthur Flour Company's recipes:
(Their website is wonderful. You can click and use either volume or ounces or grams measure.)


Directions

1) Line an 8" x 8" pan with parchment paper or aluminum foil.
2) Heat the cream and condensed milk over low heat until steaming. Remove from the heat and add the chocolate; allow it to gently melt.
3) After about 10 minutes, return the chocolate mixture to low heat to completely melt the chocolate. Whisk vigorously until the mixture is thick and shiny. Add a few drops of flavoring oil if you like; hazelnut, coffee, or vanilla are popular flavors.
4) Pour the chocolate mixture into the pan; shake the pan gently to level. Sprinkle with cocoa, if desired. Set aside overnight to slowly set up.
5) Run a knife around the edge of the pan and turn out onto a clean cutting surface.
6) Slice into 1 ¼" cubes. Heat a knife in hot water and wipe dry before each cut, for smoothest cuts.
7) Stick a wooden stick into the center of each block.
8) Roll in cocoa or crushed peppermint candy, if desired.
9) Wrap in waxed paper, parchment, or plastic wrap to store.
Yield: about 3 dozen blocks.

Sunday, November 18, 2012

Apple and Olive Oil Cake #Bundt a Month


   I read that November 15 is National Bundt Day. It's like the birthday for the bundt cake! I am a few days late for the bundt day but hey, better late than never! Life has been a little crazy around here but I had to find the time to bake this bundt cake. It's getting close to Thanksgiving, less than a week to go, so might as well think of it as a make-ahead Thanksgiving dessert. The seemingly energetic bakers Lora of Cake Duchess and Anuradha of Baker Street are hosting Bundt-a-Month. I am always happy to be able to use my beautiful bundt pan and this month's Bundt a Month theme is spice.  I like spices because I grew up with spices in all kinds of dishes, from savory to sweet. 

   When I saw that the theme is spices, I knew that I wanted to have cardamon in the cake. Not only do I have ground cardamon left from a canning project a couple months back, but I also that cardamon gives everything a clean taste.  I also wanted to use apples or pears because it is that time of year! I searched and found the Molly O'Neill recipe on the New York Times website for Olive Oil and Apple Cider Cake. It has the right proportions for my pan. I get lazy and don't want to re-calculate measurement so that it'll be right for my big bundt pan. This one sounded right for my needs but I made my own modifications. 


   I stopped by the farmer's market and got some fujis and suncrisps. I may have added in an empire as well. I added in cardamon and cinnamon while cooking down the apples. I also left many pieces of apples in the apple sauce. 

As the batter baked into a beautiful bundt, my house smelled of baked apples with a touch of cinnamon and cardamon.

   The original recipe can be found on the New York Times website: Olive Oil and Apple Cider Cake.  It's a wonderful recipe - easy with few ingredients. I wanted the apple to shine so I am calling mine Apple and Olive Oil cake.  I added in a teaspoon and half of ground cardamon and a teaspoon of cinnamon while the apples were cooking down into applesauce. I sprinkled it with confectioner sugar after it cooled a bit. This cake would be great with some whipped cream or more of the applesauce over a slice of bundt. The beauty of the bundt pan is that it makes simple delicious cakes look so pretty.  


Saturday, November 17, 2012

Maple and Chipotle Shrimp Chili


 The past month has been a rough one for my family and I but now that everyone is safe at home, I can relax a bit. Hoping for no more hospital visits. Since the recent emergency calls I had received, I now jump a little every time my cell phone rings and it's from my parent's doctor or one of them calling me at an odd hour.  Workload at job has also added to stress although everyone has been kind about my family emergency.  It's now dark before 5 PM and the past couple of weeks has required cooking comfort food.  Comfort food for me comes in many forms but I like to cook from tried and tested recipes when I just need to chop, stir and relax.  

   Recently I was talking to my friend Hima at All Four Burners about chilis and telling her about one of my favorite chilis - Maple and Chipotle Shrimp chili. Hima has a wonderful Slow-cooker Pumpkin Chili, which I made for a potluck that was later canceled. I ended up with a big pot of this deliciousness, which has some sweetness to it from the pumpkin but the spices definitely wakes you up. I had it for lunch, dinner and shared some with neighbors. I told Hima that I think I lost my  shrimp chili recipe but after a bit of decluttering and searching, I found it! You may think shrimp chili? Odd. Well, I was intrigued. I was at the Whole Foods Market when they had a chili cook-off. They had probably over ten kinds of chilis from different teams in the store. I tried all of them and loved a couple. Later, they posted some of the recipes online and this is an adaptation of that one. 

You can adjust the amount of chili powders to your taste. Add a bit more if you like more heat or less if you don't that much heat to your chili. I would increase or decrease by a half teaspoon at a time. I added in the cocoa powder because (1) I love chocolate and welcome the addition of cocoa to anything, and (2) it somehow gives the chili a certain nutty smoothness.

Maple and Chipotle Shrimp Chili

4 oz. oil 
2 tbs butter
1/2 c. flour
28 oz. can of tomatoes (I'd like to use whole plum tomatoes and then squish them by hand to pieces)
1 1/2 to 2 lbs shrimp (peeled and deveined)
4 oz. maple syrup
2 chipotles from chipotle in adobo sauce, chopped
2 (12oz) cans of black beans or black and kidney beans
10 oz. water 
2 onions, diced
2 red bell peppers, diced
1 1/2 teaspoon chili powder
1 teaspoon cumin
1 1/2 teaspoon chipotle chili powder
1 teaspoon salt
2 teaspoons cocoa powder

Cut shrimp into about 1/2 inch pieces. Put oil into a bit pot over high heat. Let it heat up a little then put shrimp in to sear. Add butter and cook a couple minutes.  Remove shrimp and put aside.  Add diced onions and peppers to pot. Sprinkle in salt. Lower heat. Stir a little and cook until tender, about 10 minutes.  Add flour and mix until it is absorbed into the oil.  Add chopped chipotle peppers, all spices, maple syrup, beans, water and tomatoes.  (Squish the tomatoes into pieces or chop them). Simmer on low heat until thickened. Add shrimp back into pot. Stir then cook a few more minutes to allow shrimp to absorb flavors and sauce. 
Enjoy! 

Saturday, November 10, 2012

CanItUp: Quince and Cranberry Chutney


   It's been a weird ten days. First the destructive Super-Storm Sandy blew through our region, leaving many without power and heat, or even homeless. The photos of all the damage (boats washed onto the land, houses half blown off) are mind-boggling.  Then we had another storm, a nor'easter! More high wind, snow/slush, more power problems.  Mother Nature has been WILD. Yet I've been fortunate to have lost only cable and internet connection.  So I must give the plug again to donate to the many wonderful organizations that are helping the people and animals in need:
    For those in the NY/NJ area, this is a useful list Where to Help Hurricane Sandy victims
    Text PREVENT to 25383 to donate just $10 to ASPCA's animal rescue and food drive operations OR
     Text ANIMALS to 20222 to donate $10 to  Disaster Relief Fund OR
     Text REDCROSS to 90999 to donate$10 to the Red Cross disaster relief efforts

   As if the two storms did not cause enough destruction, a truck hit a pole in my neighborhood, bringing down power lines. I feel for all those utility workers who had just repaired the lines from Sandy! So I have been very grateful to have my smartphone so that I can try to keep connected to the world beyond work and my neighborhood. Just as I finally recovered internet connection, I got more bad news. A close family member needed to go into the emergency room and will be in the hospital for a few days. When life gets tough, I get cooking.  In this instance, I found comfort in peeling, chopping, stirring, cooking and canning quince and cranberries for Can It Up. 

   Hima at All Four Burners is hosting Can It Up. Every month, she picks a theme and you can join for one month or every month. This month the theme is cranberries.  I love cranberries - tart, bright, brilliant red.  Cranberries are native to North America and a major crop in Massachusetts and New Jersey, both places I am connected to in many ways. When I went to school in Massachusetts, I remember visiting my friend and she told me that she lived in the area of cranberry bogs and Ocean Spray. That was the first time I saw a cranberry bogs.  Since then, I've seen more in New Jersey. They are brilliant little red jewels.

   Another memory I have about cranberries is my aunt telling me that drinking cranberry juice is good for preventing urinary tract infections.  And cranberry has lots of vitamin C. With all that going for it, I thankfully love cranberry apple juice. So what should I make for this month's Can It Up? Cranberries are great but very tart on its own and can be almost bitter.  I searched my many cook books but was inspired by something I read in Saveur, one of my favorite food magazines. It was Laena McCarthy's cranberry and quince recipe. I was intrigued because I had made quince paste (membrillo) before and loved it. 


   Quince, a fragrant fruit that looks like a gnarly apple.  It has a fuzz on the surface and you definitely do not want to eat it raw.  It's very hard and astringent but it's very high in pectin, which is great for jams and jellies.  I've cooked quince in syrup and eaten it as a dessert.  It's delicious. I find quince so interesting and want to share more information with you about it so try this: wikipedia

   I also like this recipe because it's perfect for Thanksgiving. One less thing to do for Thanksgiving Day. And it will go well with leftover turkey to make a sandwich.  


The quince can be hard to peel and chop. I found that a vegetable peeler worked great for peeling the quince. Then quarter it with a sharp knife and cut out the seeded part. 


Lastly, I love this beautiful color - quintessential Fall.

If you are unfamiliar with canning/preserving, please read more about it at Food In Jars.  In fact, read before you start canning in order to familiarize yourself with it. It's not hard but there are some essential steps that should not be missed. Marisa of Food In Jars has a wonderful list of resources and I find her blog to be very informative.  

Quince and Cranberry Chutney
   adapted from Jam On by Laena McCarthy

1 lb. quince (two medium-big ones, about 3 cups diced)
1 lb. cranberry
1 cup apple cider vinegar
1 cup sugar
2 oz. bourbon
2 tbsp raisins
about 1/2 teaspoon fresh ginger, grated or more to taste
1/2 cup water

Cover the raisins with the bourbon in a bowl. Let it sit for at least 30 minutes so that the raisins can get nice and plump with the bourbon. Rinse and peel the quince. Remove any blemished flesh. Core and dice the quince to get three cups.  Rinse cranberries and drain; set aside.  Place the quince, sugar, raisins (including the bourbon), vinegar, and water into a 6- to 8-quart nonreactive pot; stir well.

Wash and rinse your jars; put them into a big stockpot; cover the jars with water and bring to a boil, lower heat. You can also wash your jars in the dishwasher as you do the preparation work in order to make sure you have clean and warm jars.  Get lids and rings ready. Put lids into a bowl.

Bring the fruit mixture to a boil over high heat, stirring frequently to prevent scorching. Reduce the heat and cook uncovered at a steady simmer for about 30 minutes.
Add cranberries and cook for 30 more minutes. Gradually reduce the heat if the jam starts to stick and scorch.  Add ginger toward last ten minutes.  Keep a watchful eye and stir vigilantly for the last 5 to 10 minutes. When the chutney has thickened and big bubbles are popping all over the surface, test for consistency. You can place a teaspoon of the hot chutney onto a frozen spoon. Place it back in the freezer, with chutney on it, for 3 to 4 minutes.  Remove the spoon and test the gel by tilting the spoon vertically. If it's thick then it's ready.

Once it is done, give it a quick stir and turn off heat.
Fill jars and process in a boiling water bath for 10 minutes.

Yield: 4 (8 ounce) jars plus another half jar.

Note: Keep in mind that your fruit might have more juice and may take longer to cook down. Your yield may be different from mine depending on your fruit. 

Saturday, November 3, 2012

A meal to fight the storm: Chocolate and Port Beef Stew

First, I must give some resources to donate for those affected by Super-Storm Sandy. There are many more organizations that are helping those in need, including Meals on Wheels in NYC so these are just a select few of the relatively reliable organizations that have made it very easy to donate : 

Text PREVENT to 25383 to donate just $10 to ASPCA's animal rescue and food drive operations OR
Text ANIMALS to 20222 to donate $10 to Disaster Relief Fund OR
Text REDCROSS to 90999 to donate$10 to the Red Cross disaster relief efforts

And if you need assistance, you can call the Federal Emergency Management Agency (FEMA) at 800-621-FEMA (3362) and TTY is 800-462-7585.  

Now back to regular blogging:
   Comfort food is different for each person.  For some, it's mac and cheese; for others, it's dumplings. Recently, we've had to live through the scary Super-Storm Sandy.  Wind was high, rain sideways, transformers exploding. I found listening to the Antiques Roadshow (until the cable went out) to be soothing. I also wanted to cook food that will last for days if a power outage happened. I am oh so grateful that I did not lose power while many I know lost power and heat for days. During uncertain times and stormy weather, one of the most comforting foods for me is a good stew. And if chocolate is part of it, even better. 

   Initially, I wanted a chili in my slow cooker but as I searched for my favorite chili recipe in my folder, I came across a recipe for Chocolate and Port Beef Stew. I had made it last winter and had gotten rave reviews from friends so I decided to go with it. I first read about it at NPR, Chocolate Savories for Your Sweet.  I love chocolate but most recipes are for desserts. I am fine with that but it's even better when I find recipes for savory dishes. I love expanding the use of cocao! This dish is lush - creamy, chocolatey, filling, spicy but not too much heat.  My kitchen smelled like a rich dark chocolate bar with a touch of spice. You might think that I am exaggerating but the smell of the port beef and chocolate gently simmering reminded me of those HGTV shows when they stage a house for sale and put cookies in the oven to entice prospective buyers. 

   If you think chocolate for a stew is strange but have had Mexican food, this dish reminds me of mole (haven't learned how to get the accent over words yet on this Blogger). It has a slight sweetness from the carrots, enriched by the port and chocolate. I added extra cinnamon but you can just taste it.

Chuck roast that I cut into cubes.

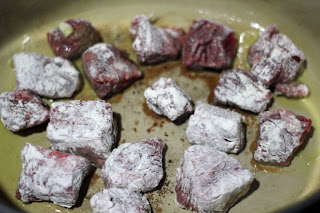
Beef cubes, dredged in flour with salt and pepper and in pot to be browned.
Beef browned and put aside in plate while the carrots, onions, etc. cook.  This will be added back to the pot later.  My Mom used to tell me to brown my meat and of course, she's right. Browning the beef first (but not cooking it through) gives a nice aroma to the pan and adds extra rich flavors for your stew.   
The other essentials for this stew.


After adding chocolate - 71% Valhrona.


Chocolate and Port Beef Stew 
I put my own changes in parentheses ( ).
Makes 4 servings
Ingredients:

1 1/2 tablespoons olive oil
1 to 1 1/4 pounds chuck roast or top round, cut into 1/2 inch cubes
2 tablespoons all-purpose flour (I used about 3 tablespoons), seasoned with salt and pepper
2 garlic cloves, peeled and sliced
1 medium yellow onion, cut into big dice
4 celery stalks, sliced (I skipped this because I didn't have celery)
3 carrots, peeled and diced (I cut four carrots into big chunks since it was going to cook on the stove for some time)
1 cup port
1 cup beef broth ( I used water since I did not have beef broth)
1 (14-ounce) can stewed tomatoes with juices
1/4 teaspoon cayenne pepper
1/8 teaspoon ground cinnamon (I put in closer to 1/2 teaspoon)
2 ounces dark bittersweet chocolate (I used 71 %)
1 1/2 tablespoons pepitas or sunflower seeds (I skipped it because I didn't have it)

Instructions

In a large, deep pot over medium-high heat, warm olive oil.  Dredge meat in seasoned flour.  Cook until browned all over, 5 to 7 minutes.  (Don't overcrowd meat or it'll steam.)  Transfer browned meat to a bowl.  In the same pot, add garlic, onion, celery and carrots and brown for 3 to 5 minutes.  Deglaze the pot by adding the port and using a wooden spoon to scrape the brown bits from the bottom.  Return browned meat to the pot.  Add broth, tomatoes, cayenne pepper, cinnamon and salt.

Cover and cook on low for 50 to 60 minutes, stirring occasionally until meat is very tender.  Stir in the chocolate until just melted.  The stew should be thick and richly colored.  If you'd like it soupier, add a little more heated beef broth until desired consistency is reached.  Serve plain or atop cooked rice or polenta, and sprinkle each serving with 1/4 of the pepitas.

Tuesday, October 30, 2012

Chocolate Chili Waffles with jam


First, I hope everyone is well and Super-Storm Sandy did not cause too much damage to you and your family.  My sympathies to those who have been affected, including my own family and friends. While it's been a rough few days and lots of anxiety as everyone prepared, then suffered through the high winds, rains and water of Sandy, I am very grateful to have power and heat. How to pass away those hours with no TV and preparation in case of power outage? For me, it was cooking!

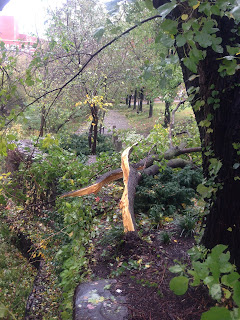
Tree felled by Super-Storm Sandy in NJ park.
 
Whole grains seem so difficult and time consuming to use, doesn't it? I used to think it was beyond my skill level but wished I could use more whole grains. When I discovered Kim Boyce's book Good to the Grain, I was fascinated by all the many whole grains out there and the delicious baked goods these whole grain flours can create. She wrote about flours from whole wheat, millet, quinoa, and so many other whole grains that I had never heard of! I'll write about some goodies I made from her book at a later date because I recently also found Maria Speck's Dark Chocolate Chili Waffles with Spelt Flour and just had to make that.  

Maria Speck wrote Ancient Grains for Modern Meals.  Another wonderful book - creative delicious recipes, all starring whole grains.  She makes whole grains seem so much less intimidating for everyday dinners and desserts.  She tells you how you can cook grains ahead of time and how to reheat without drying out the grains.

When I read her recipe for Dark Chocolate Chili waffles, I was intrigued.  I get to use whole grains (spelt) and chocolate. Chocolate, to me, is essential to a good day. Chocolate with high cocoa content is high in flavonoids, which is good for you and I'll take any good news about chocolate. But most importantly, I love recipes that use chocolate for savory foods too. The internet is abound with recipes for chocolate desserts so it was nice to see Maria Speck's recipe for chocolate chili waffles. It has rich chocolate flavor, barely sweet (but can add more sugar for a sweeter waffle or milk chocolate) and a slight kick from the chili flakes.  The little pep gives extra character to the waffle. 

The full recipe can be found here: dark chocolate chili waffles with spelt flour and raspberry sauce/ but this is what I did following her recipe.


I used spelt flour and Hershey's Cocoa, Special Blend - a blend of natural and dutched cocoa. For the chocolate, I had Valhrona's 71% cocoa, which I got from Trader Joe's.


Above, I am stirring the wet ingredients with the dry. You see how it still has some lumps and that's just the way it should be. It should not be super smooth. That unusual looking thing I stirred with was a dough whisk, which you can find at King Arthur Flour. Maria Speck recommends this in her post too. I first read about this essential gadget at Chocolate and Zucchini. I later purchased it at King Arthur Flour and have been happily using it since. What is so special about it? Well, it whisks without getting the batter stuck in-between the wires in a wire whisk.


Here is one batch of my waffles. I love my waffle iron with the mini-waffles. Three mini-waffles equal one regular waffle. You may be wondering how does this waffle taste. This waffle is delicious! It's a keeper.  You can also add extra chili if you like more spice to your waffles.

I served mine with a sprinkling of confectioner's sugar and the raspberry jam with chocolate that I made over the summer. It would be delicious with some freshly sliced apples and maple syrup too. This is especially gratifying and comforting on a stormy day.

Saturday, October 27, 2012

Farmer Market finds: Mushrooms, apples, squashes


Since the news is all about hurricane Sandy and preparation for the impending tropical storm for us, I stopped by the Stockton Farm Market to get some food for the upcoming days stuck close to home. And yes, I also went to the regular supermarket to get water and battery. I already had other staples for a week but got to have some fun even in a storm, right? 

I found these interesting new (at least to me) mushrooms:

Cauliflower mushrooms can be found growing from the bases or roots of trees in eastern North America's hardwood forests.  Stephanie, my mushroom lady :), told me that these can be simply saute with butter.

Above is the oyster mushroom, which I have cooked before but I had never seen it all still on its stem.  It was huge!  

Above is what is called the "chicken mushroom" or sulphur shelf mushroom.  It is like portabella in that it's meaty in texture. I bought some of these to try.

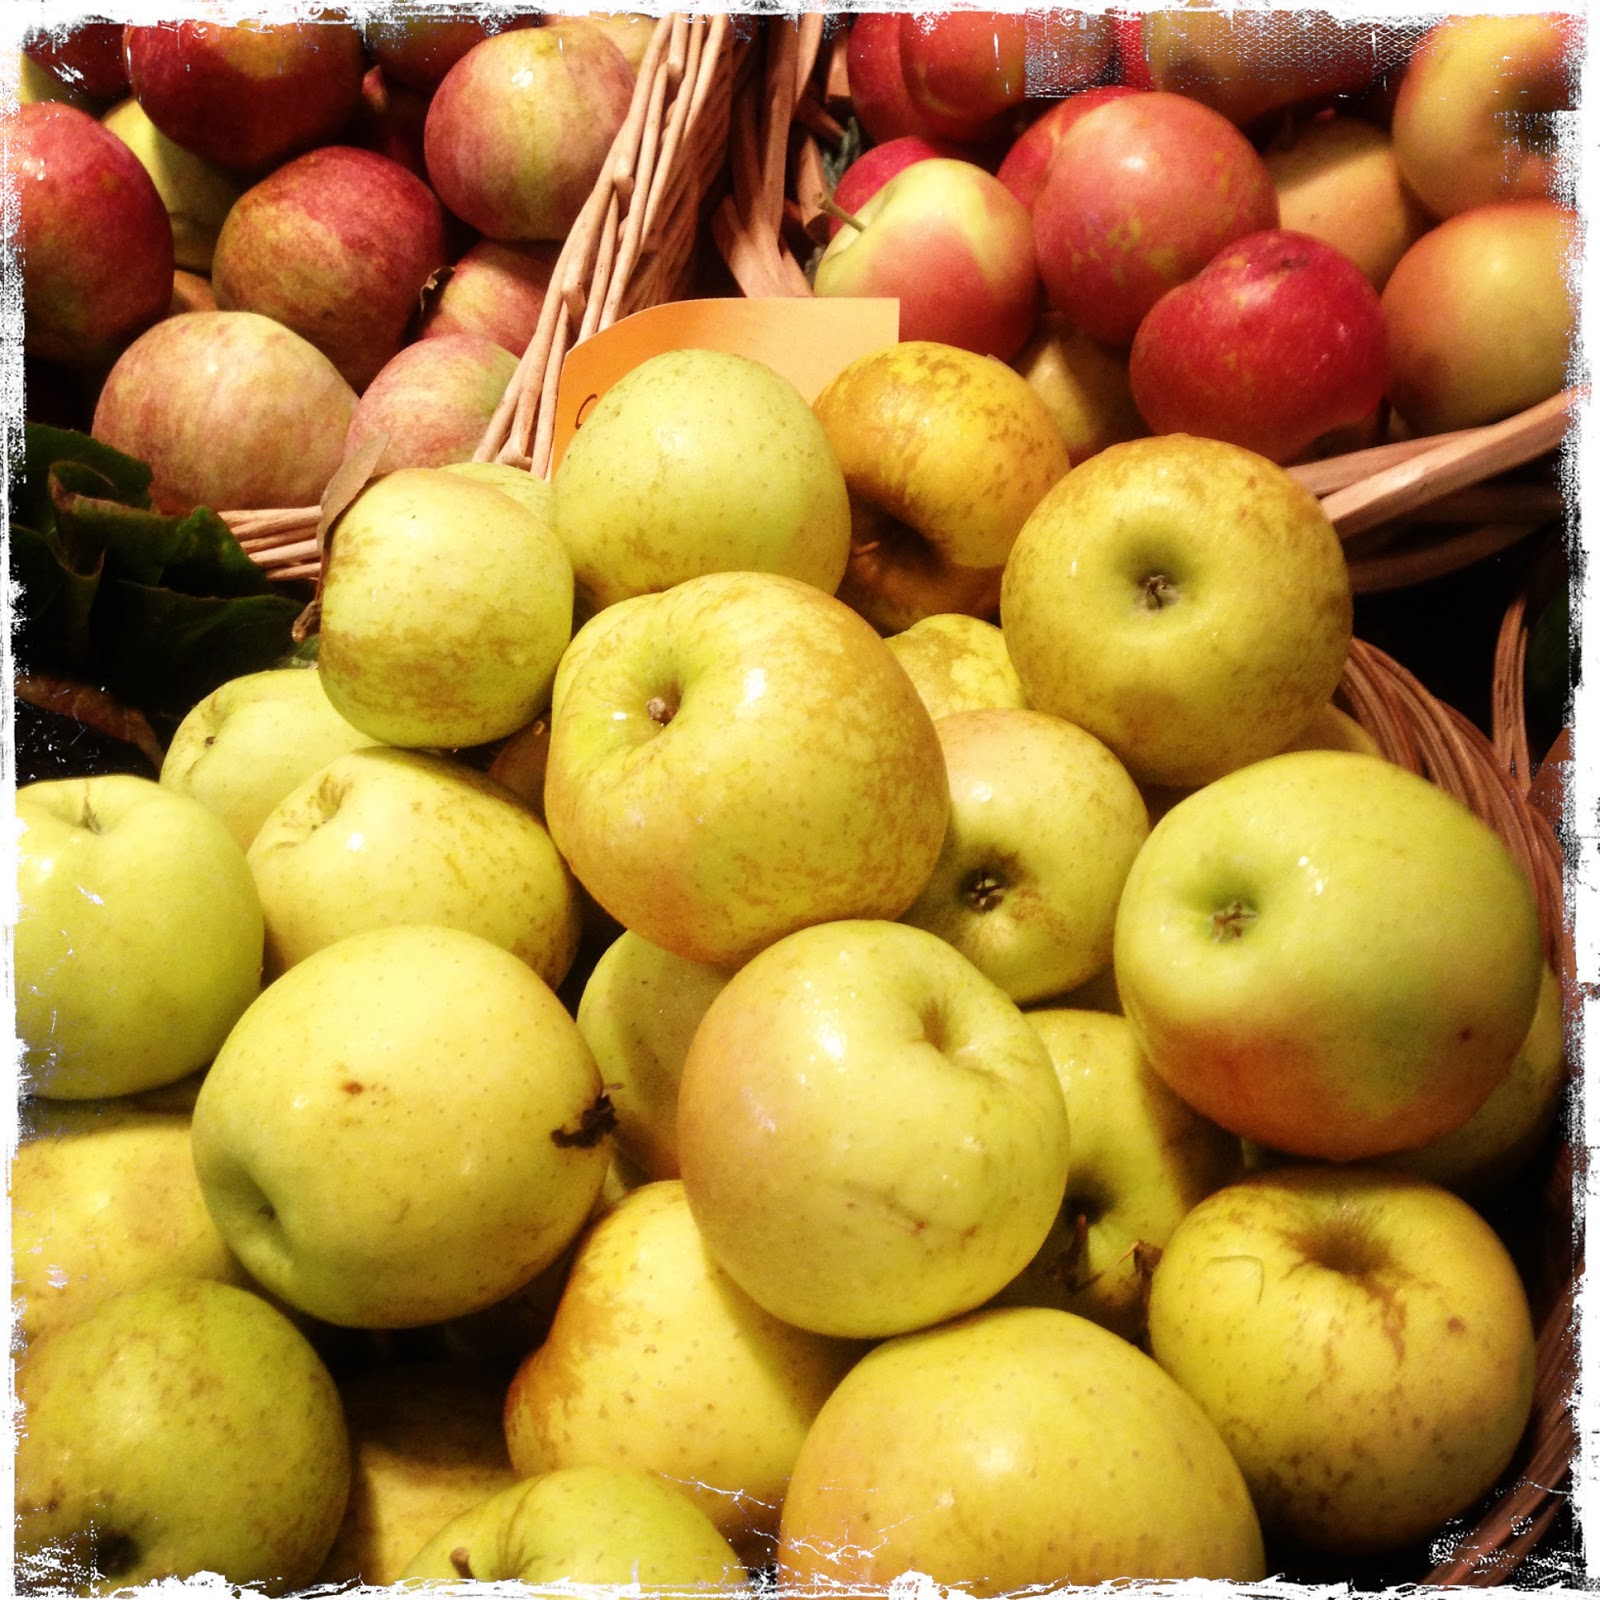
 I love Fall except for the impending hurricane and the shorter days. The Market also had these crisp apples and squashes.


Wednesday, October 24, 2012

Can It Up: 2nd Round of Apples

     Hima's post at All Four Burners about her vanilla rum Apple Butter sounded so delectable that I had to do it too.  I've had great success using my Crockpot/slow cooker for blueberry lime butter. I must thank Marisa at Food In Jars for her wonderful instructions and encouraging voice. When I read Hima's apple butter, I was intrigued.  The flavor profile just sounds so good.  

     I already participated in October's Can It Up with my Candied-pickled Apples but what the heck, I've got more apples at home.  I had to make some modifications but for the most part followed Hima's recipe so I won't rewrite the recipe here.  You can click on the link above at All Four Burners for the full recipe.  Here are my modifications in case any of this may help anyone else making it.  

     I had five pounds of apples (granny smith and Fuji, and a couple of Liberty) but a couple of them went bad. I ended up with four pounds of apples so I cut the recipe by 2/3.  I used 1 1/3 cups apple cider instead of 2 cups. Also 1 1/2 cup sugar. I had vanilla beans and put those in my coffee grinder (after cleaning it of course) and ground it up.  Unfortunately, it was not as ground up as I'd like. As for the rum, toward the last 2 hours (it's hard to predict the exact amount of time due to apples) I added 1/4 cup then at the last hour, added more for a total of about 1/3 cup rum. My yield was five 8 oz. jars.

     Just a note about canning if you are new to this.  The amount of liquid in the fruit varies so the cooking time in recipes will be an estimate.  You may have to cook your fruit for a longer period of time because your apples are juicier or vice versa, less cooking time because your apples are less juicy.  Check it often.  I originally used my little slow cooker (1 1/2 quart), which was a gift I got one year.  It was filled to the top with my four pounds of apples.  After cooking the apples in it overnight, I realized that I had to switch to my bigger slow cooker, the 4 quart.  That was just perfect.  Overall, it took almost 12 hours for me on low in the slow cooker.  It may have taken a longer time because my first pot was too small so that the liquid did not evaporate as well.  At the end of the day, I got five jars of delicious apples. 

Thursday, October 18, 2012

Paw Paw Sorbet


I love discovering new food. I was walking through one of my favorite farmer markets, Stockton Farm Market, when something caught my attention and I made a new food discovery.  It was green and reminded me of a tropical fruit, like a mango.  I walked closer to the table and took a good look at it. It's kidney shaped and smells kind of like a ripe banana. I asked the nice lady behind the counter and she explained that it's a native North American fruit and these were gathered from the wilds of Eastern Pennsylvania.  She gave me a spoon with a bit of the meat of the fruit to try.  It was soft and custardy.


She told me that it could be used in sorbet and gave me a recipe by Mads Refslund.  I bought two big ripe ones. They look green even when ripe but do feel soft to the touch.  Of course, I had to research this new fruit. So, it's in the same plant family as the cherimoya and custard-apple.  It's native to Eastern, Southern and Mid-Western United States. The fruit grows on trees or large shrubs.

After making the paw paw sorbet, I left it in the freezer overnight.  I tasted it the next night and it was very smooth and definitely have that ripe banana taste.  It is definitely something I would try making again, especially since it was so easy to do.


Paw Paw Sorbet

About 12 ounces of paw paw, peeled and deseeded
1 1/2 cups simple syrup (take equal parts sugar and water, heat until the sugar is just dissolved)
2 teaspoon lemon juice
pinch salt

Puree in a blender and pour into an ice cream maker.  That's it.